Wednesday, April 22, 2009
Blog Candy!
Tammy is celebrating her 100th follower with blog candy! She has a wonderful blog with many inspiring layouts and other paper crafts. Check it out!
New life for TBBM!
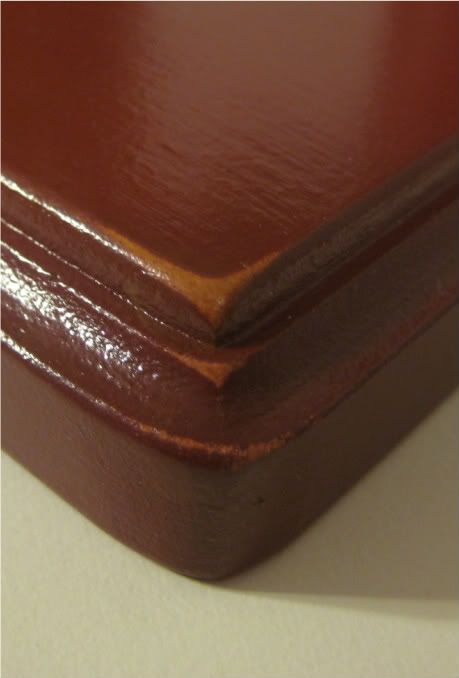
I know I know you must all be tired of hearing about Sarah's adventures with acrylic, but this is too cool to pass up. In a previous post I had mentioned there were two thicknesses of the acrylic. I finally got around to cutting the .007 sheets and they cut like butter! Easier than paper! Better yet is it is PERFECT for box making. Tags, Bags, Boxes & More has NEVER been more fun! I was just goofing around to try cutting settings out (blade 6, pressure max, speed high, multi-cut 1) and made thse cute little boxes. The finished sizes are just under 2", and just under 1" square. Wouldn't they make sweet little party favors for a bridal or baby shower? Maybe fill them with mini blossoms, buttons and brads and hand them out at the next crop you host...Anyway you want to gift them they are sure to please.
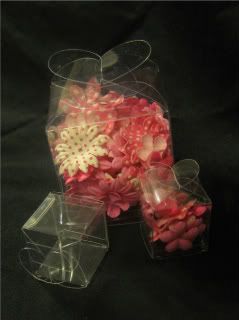
I can't wait to try out some other boxes and see how they fare. Clear library pockets and tags sound awesome too!
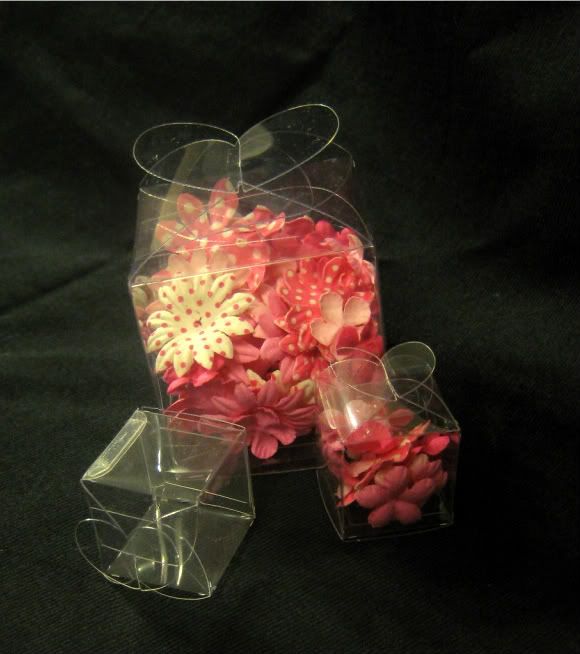
I can't wait to try out some other boxes and see how they fare. Clear library pockets and tags sound awesome too!
Saturday, April 18, 2009
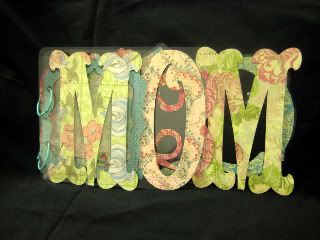
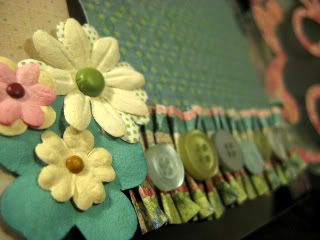
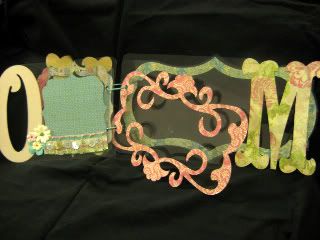
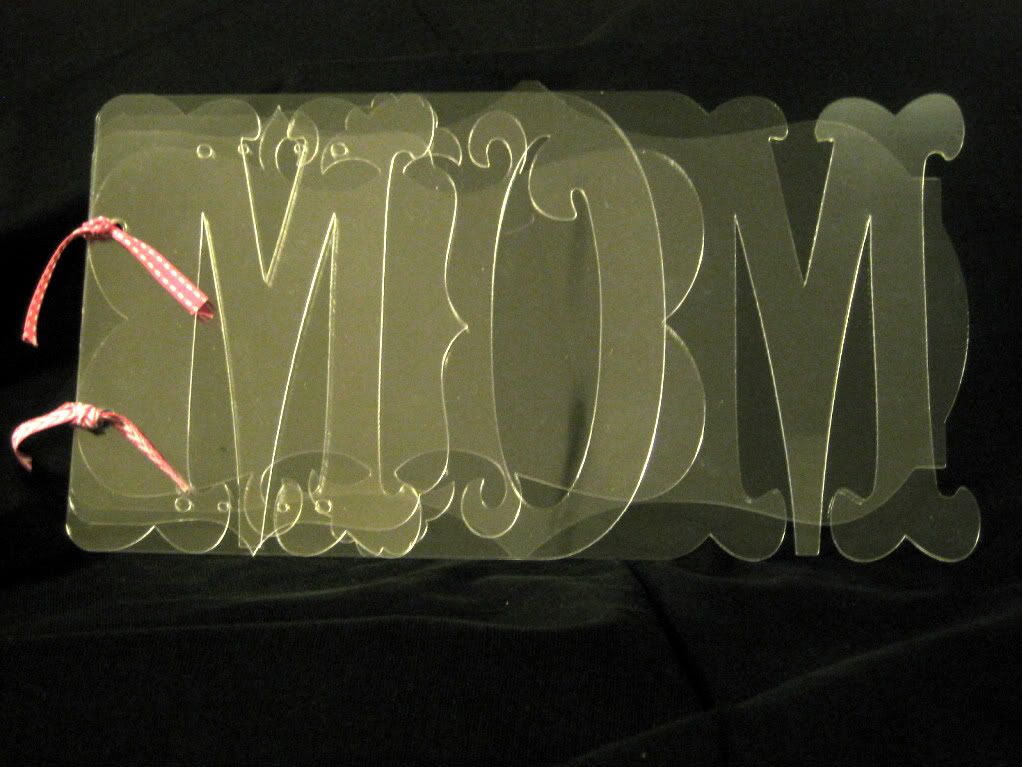
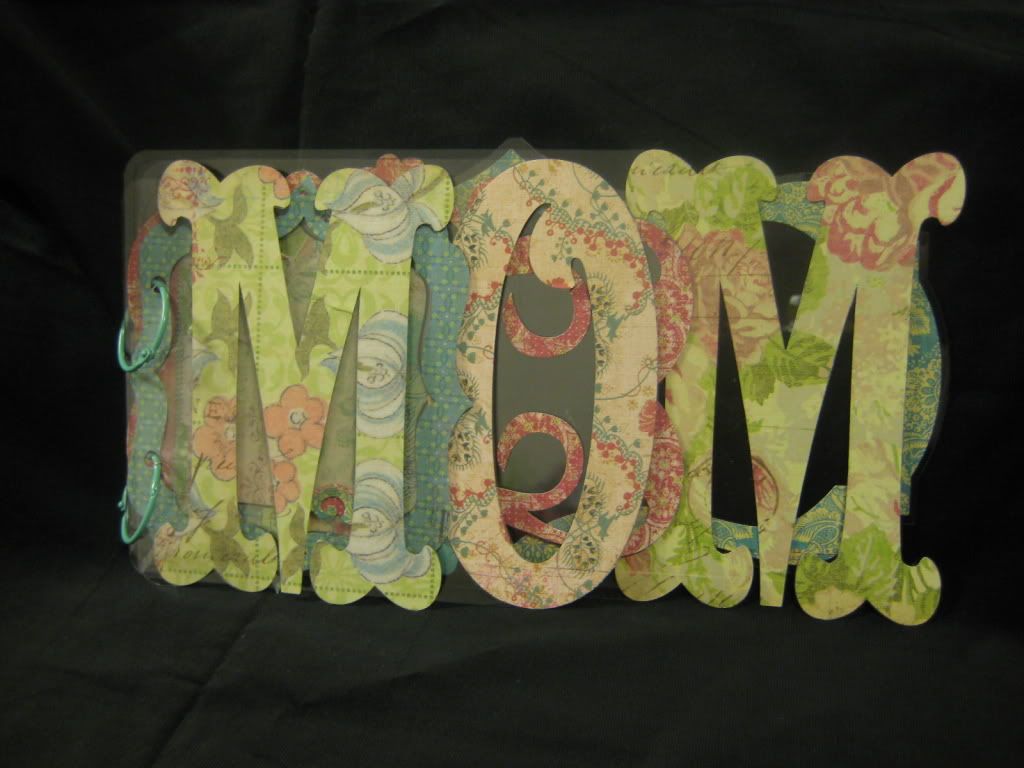
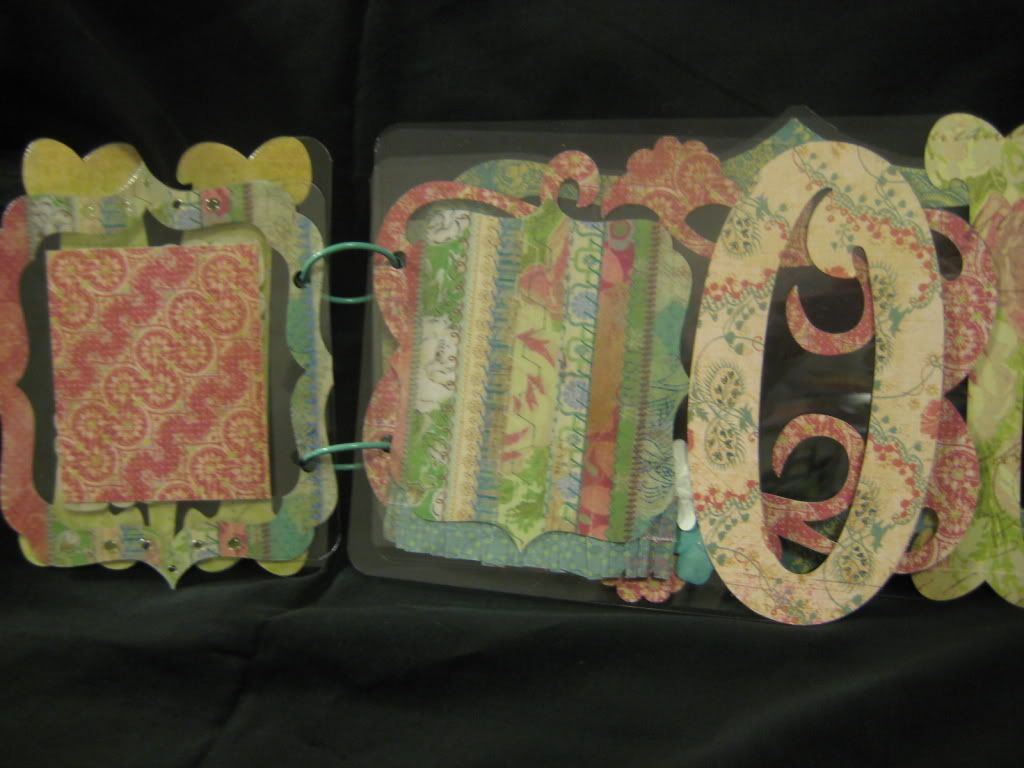
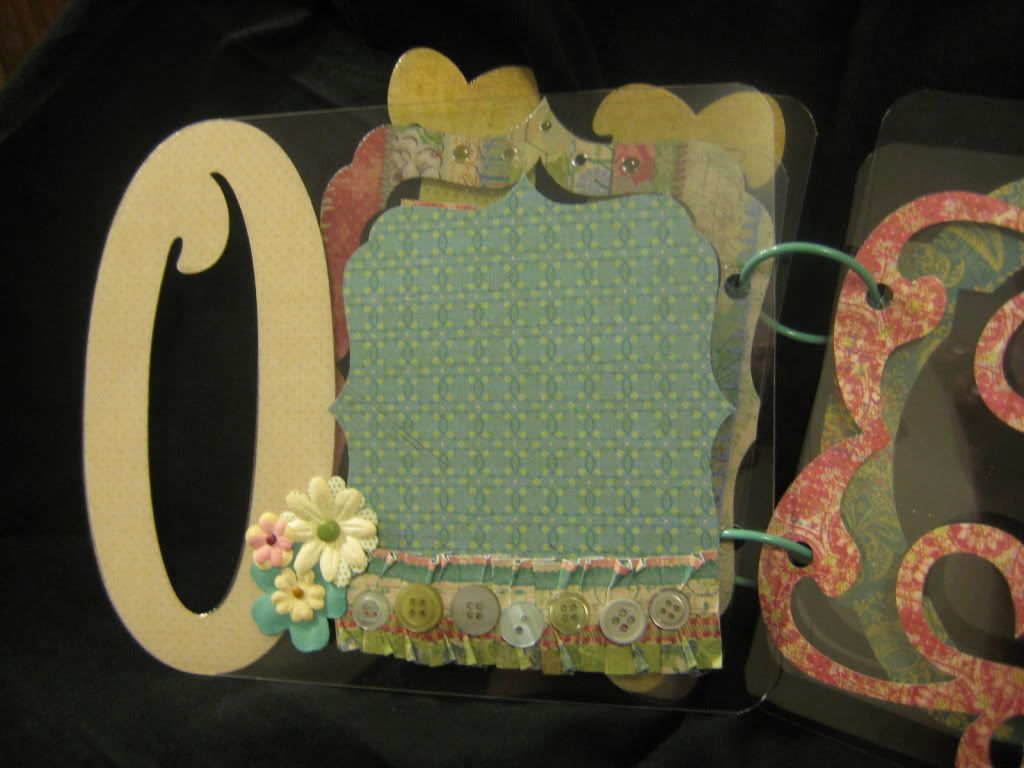
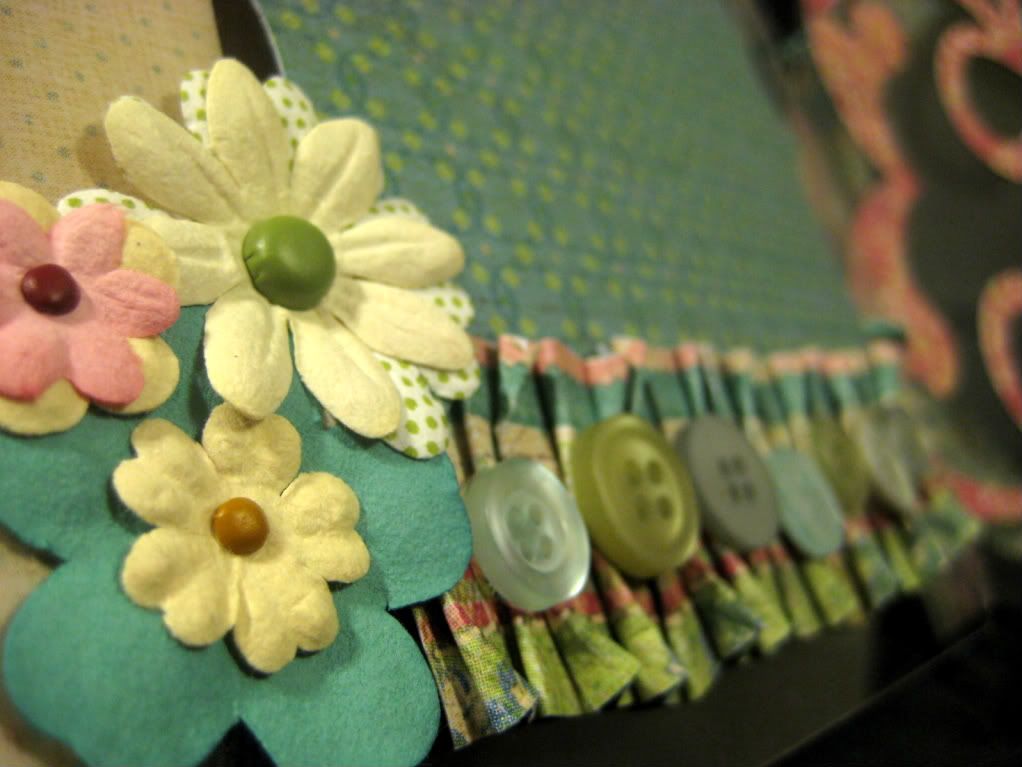
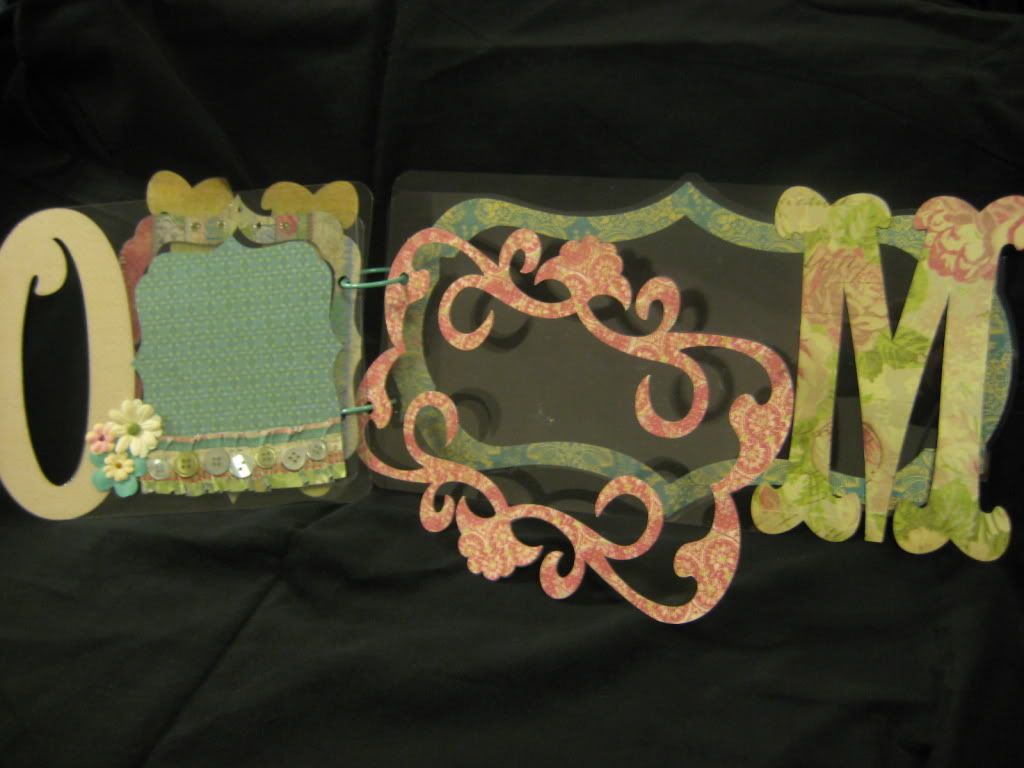
Acrylic for Mom
Here is the album I am making for Mother's Day. I am so addicted to acrylic! The entire album was made on Design Studio using the Storybook cartridge. This has to be my all time favorite cartridge. I am still working on the rest of the pages. This is what I have so far!
Click on images for larger view.

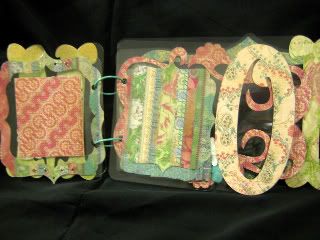
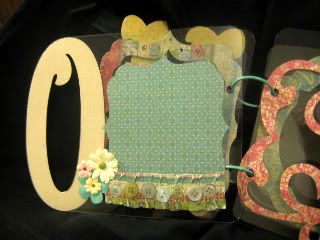
Click on images for larger view.
ATG gun stand
I received the most beautifully made ATG stand from a dear friend of mine. I finally got around to painting it and now I am showing it off. Thank you so much, Missy!
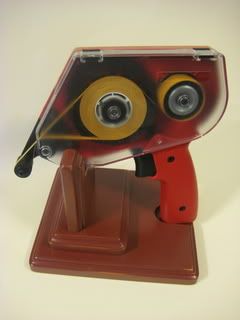
A closer look at the distressing.
A closer look at the distressing.
Monday, April 13, 2009
Design Studio FAQ
I get asked a lot of questions about my files, and Design Studio in general. This particular one comes up from new users quite frequently!
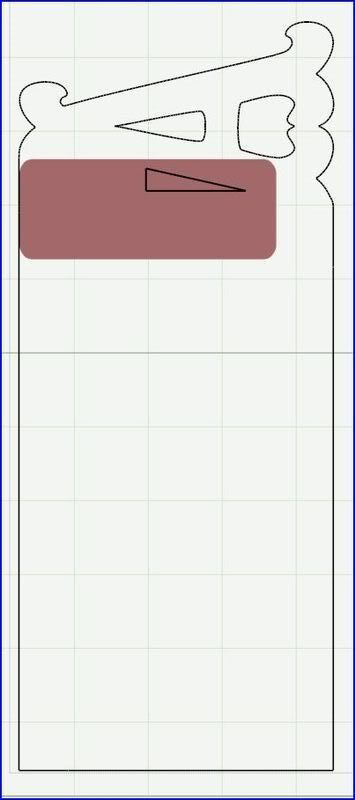
Q: When I look at some cut files, there are extra shapes and lines. What are they? Do I need to do anything with them?
A: The extra shapes are lines are portions of welded shapes that were used to make the larger overall shape that you will be cutting. You do not need to do anything with them if the file was made correctly. Any file from me will come pre welded and ready to cut.
I have some sample screen shots so you can see what I am talking about.
This shows what this particular word book page looks like on Design Studio. Notice the extra small rectangles next to the A? They actually make up part of the page, so that the page is solid and the A is fully attached.

This shows what the actual CUTTING line looks like via the preview button (the eye on the left of the virtual mat). In order to get your preview to look like this you need to open a blank page, then hit preview. It will leave off the extra shapes and just show the heavy black cutting line. Make sure that you only have one page set to preview at a time. You can right click on the page, and either check or uncheck the "include page in preview" option to do this.

This view shows a preview, where one peice was NOT welded. The non-welded peice shows up as a solid color. Previewing is a necessity when welding multiple components into one single object or design. Welded portions will show a solid black outline, and no color. Non-welded portions will show a solid color fill.
I really hope that helped a little. If I confused you further I do appologize! Feel free to ask questions! I enjoy answering them, and helping others to enjoy the craft!
Q: When I look at some cut files, there are extra shapes and lines. What are they? Do I need to do anything with them?
A: The extra shapes are lines are portions of welded shapes that were used to make the larger overall shape that you will be cutting. You do not need to do anything with them if the file was made correctly. Any file from me will come pre welded and ready to cut.
I have some sample screen shots so you can see what I am talking about.
This shows what this particular word book page looks like on Design Studio. Notice the extra small rectangles next to the A? They actually make up part of the page, so that the page is solid and the A is fully attached.
This shows what the actual CUTTING line looks like via the preview button (the eye on the left of the virtual mat). In order to get your preview to look like this you need to open a blank page, then hit preview. It will leave off the extra shapes and just show the heavy black cutting line. Make sure that you only have one page set to preview at a time. You can right click on the page, and either check or uncheck the "include page in preview" option to do this.
This view shows a preview, where one peice was NOT welded. The non-welded peice shows up as a solid color. Previewing is a necessity when welding multiple components into one single object or design. Welded portions will show a solid black outline, and no color. Non-welded portions will show a solid color fill.
I really hope that helped a little. If I confused you further I do appologize! Feel free to ask questions! I enjoy answering them, and helping others to enjoy the craft!
Sunday, April 5, 2009
Where to buy!
I finally figured out where the acrylic sheets I have been using came from! You can find them at AccucutCraft The sheets I have been using are the .02 thickness. The .007 is awesome to cut for cards! You have to buy it in bulk at a minimum of 25 sheets, so you may want to get a few friends together and split the package up.
Subscribe to:
Posts (Atom)