Showing posts with label design studio. Show all posts

Saturday, April 18, 2009

Acrylic for Mom

Here is the album I am making for Mother's Day. I am so addicted to acrylic! The entire album was made on Design Studio using the Storybook cartridge. This has to be my all time favorite cartridge. I am still working on the rest of the pages. This is what I have so far!

Click on images for larger view.


Monday, April 13, 2009

Design Studio FAQ

I get asked a lot of questions about my files, and Design Studio in general. This particular one comes up from new users quite frequently!

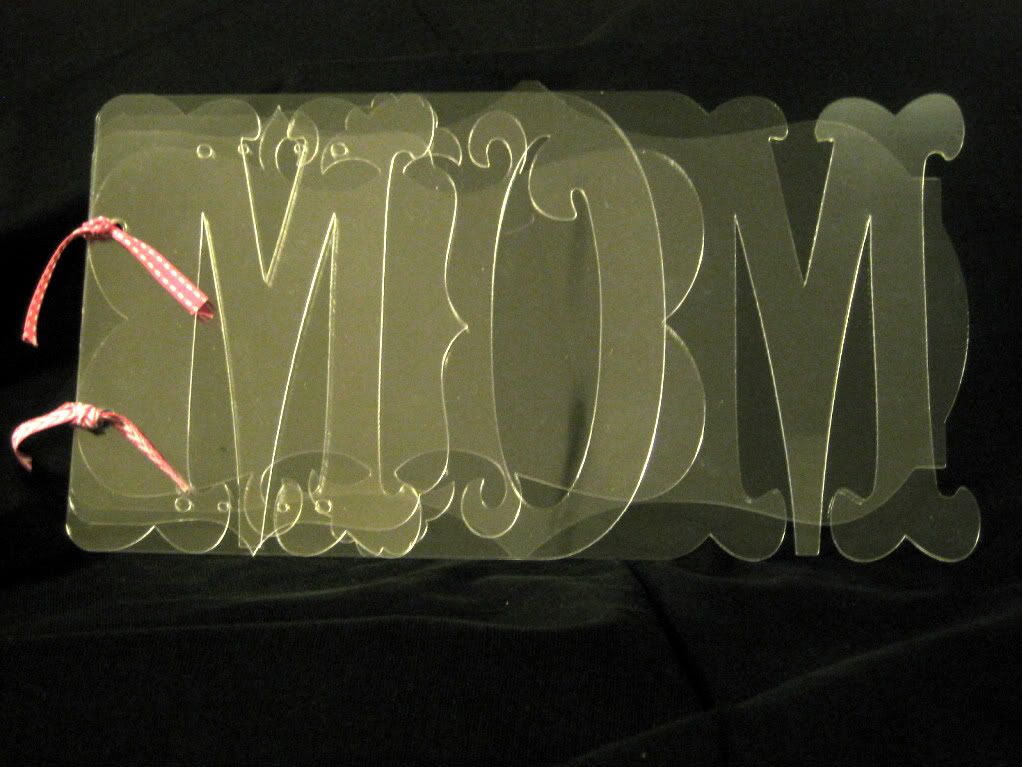
Q: When I look at some cut files, there are extra shapes and lines. What are they? Do I need to do anything with them?

A: The extra shapes are lines are portions of welded shapes that were used to make the larger overall shape that you will be cutting. You do not need to do anything with them if the file was made correctly. Any file from me will come pre welded and ready to cut.

I have some sample screen shots so you can see what I am talking about.

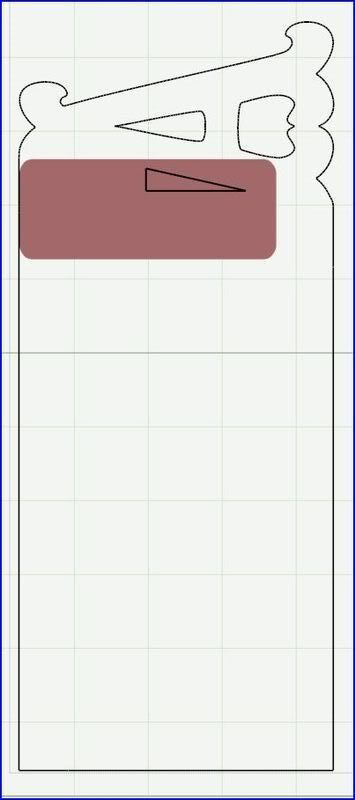
This shows what this particular word book page looks like on Design Studio. Notice the extra small rectangles next to the A? They actually make up part of the page, so that the page is solid and the A is fully attached.
Photobucket

This shows what the actual CUTTING line looks like via the preview button (the eye on the left of the virtual mat). In order to get your preview to look like this you need to open a blank page, then hit preview. It will leave off the extra shapes and just show the heavy black cutting line. Make sure that you only have one page set to preview at a time. You can right click on the page, and either check or uncheck the "include page in preview" option to do this.
Photobucket

This view shows a preview, where one peice was NOT welded. The non-welded peice shows up as a solid color. Previewing is a necessity when welding multiple components into one single object or design. Welded portions will show a solid black outline, and no color. Non-welded portions will show a solid color fill.
Photobucket

I really hope that helped a little. If I confused you further I do appologize! Feel free to ask questions! I enjoy answering them, and helping others to enjoy the craft!

Saturday, February 7, 2009

Valentine paint can swap

This is what I came up with for a Valentine themed paint can swap. This was my first time altering a paint can. I love the components, but not sure I love how I laid them out together. I think it's a tad too assymetrical, or maybe not enough to look intentional. One of the two! It's filled with lots of scrapping goodies. Dimensional stickers, clear stamps, chipboard album, 6x6 valentine paper pack, a pop up candy valentine card, ribbons, eyelet button thingies...lots of neato things. Afterall, it's what is on the inside that matters most, right? I hope so anyway!

The papers are from the K&Company Sweet Talk speciality paper pad. I also used open stock solid cardstocks for the die cuts. The gem studded floral embellishments are by Flora Doodles. I just arranged them in a heart shape. Quick and easy!

Photobucket

Photobucket

Photobucket
I am however in love with this owl! I modified the owl found in the Storybook Font Cricut cartridge to look similar an owl pillow that I got for my little girl at Target. I may have to cut it out of vinyl and put it on a t-shirt! Design Studio rocks!

Photobucket

Photobucket

Here is the lovely card:
Photobucket

Photobucket

Photobucket

A special thank you to Lori Henrey at my LSS Ben Franklin Too for having the valentine card class! These were so fun to do!